| |||
 |
 |  |

|
 |
 |  |
||
 |
 |
||
 |

| ||
| |||
|
|
| |
|
|
|
| |
||
|
|
||
|
| ||
Written by Paul D. Race for Family Garden Trains(tm)
 and Big Indoor TrainsTM and Big Indoor TrainsTM |
| Please Read: How to Help Our Site at No Cost to You - Some of our articles contain recommendations for products we like and vendors we personally trust. Some of those vendors may pay us a very small commission if you click on a link and buy their products. This costs you nothing at all and helps offset the costs of what we do. So if we point you to something you decide to buy later, please make certain you come back through our site and click on the link directly. Thanks. |


|
Using a Craftcutter to Create Building Fronts
In all of these articles, we define "craftcutters" as tabletop machines that are designed chiefly for the purpose of cutting vinyl and other materials for craft projects. These include products from Cricut, Sihouette, and many other brands. This particular article describes one kind of project that a model railroader or diorama builder who is fairly familiar with their craftcutter and the software that drives it can attempt with reasonable likelihood of success. How I Got My Idea for this Project - My interest in such applications goes back before craftcutters existed, to a massive garden railroad project that was considering using signcutters for their buildings. Back in the early 2000's, I was contacted by an arboretum that was setting up a Christmas-themed garden (outdoor) railroad for the first time.
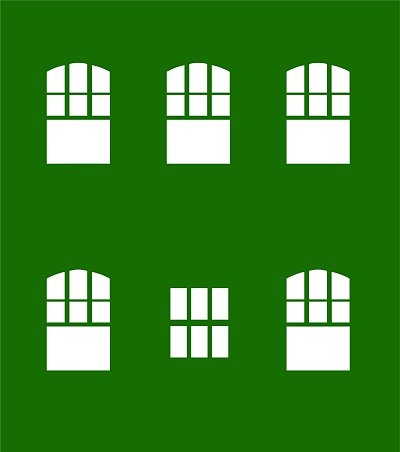
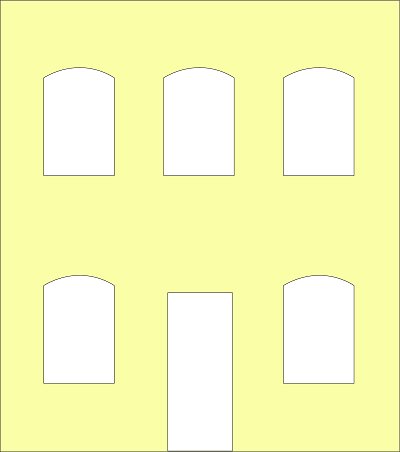
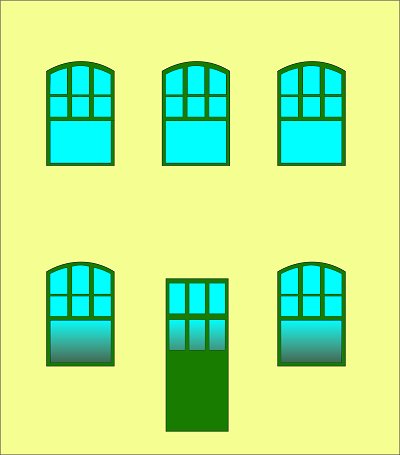
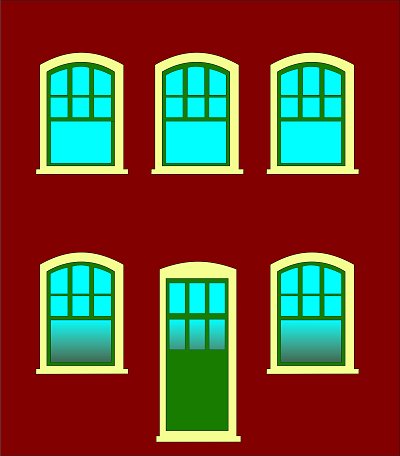
Ironically, the sign shop never made the buildings - instead they hired Paul Busse's Applied Imagination to build the railroad, and they've never looked back. Personally, I think they made the right choice, but their original idea was sound. But when I finally bought a craftcutter decades later, I remembered what they had proposed. How could simply layering colors give the effect of a building? I am quite experienced with computer graphic programs like CorelDraw, so creating an SVG file that would drive my cutter was no challenge. For the examples I describe here, I chose green window mullions, pale tan "trim," and brick red walls. And let's assume that - if you're no designer yourself - someone who shares your interests has already developed the vector graphics you need. (Actually we have provided both examples below in O, S. and Large Scale.) You start by cutting a layer of green vinyl that includes the window mullion shapes. When you apply this layer to your underlying plexiglass, you will still be able to see through the "windows." Next you cut and apply a layer that will represent the trim color. There will be holes for the mullions and door to show through, but not much else. Next you cut and apply a layer that represents the wall. It lets just enough of the "trim" to show through to give it definition. Note: SVG graphic files for each of these layers is provided in links below. If your craftcutter software allows you to import SVG files, you can cut them yourself.
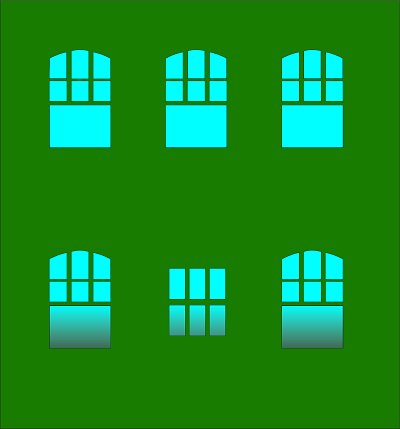
What happens when you stack them up? In the illustration below, the blue represents the clear windows.
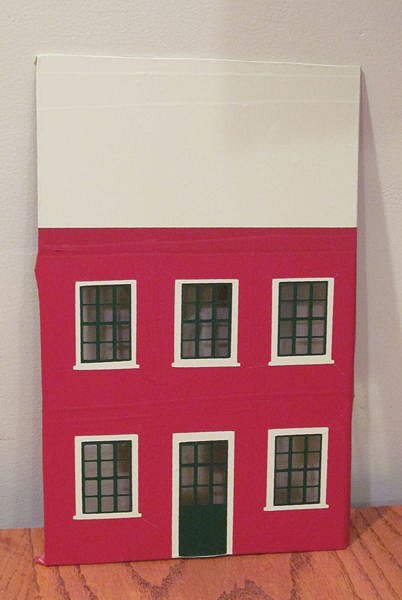
The photo to the right shows one of our earliest experiments, just to show you that it can be done. No, it's not quite easy as I made it sound, but I made the mistake of not using transfer tape when I did this one. Okay, you say, this is a lot of work to go through for one little building. But once you have the basic graphics, you can make as many buildings as you want, in any size up to the size your signcutter will handle. What if you wanted to imitate, say, the factories in the North Pole scenes of Polar Express? A whole town of factories? Now that that's out of the way, here are the links to the patterns we have so far:
Large Scale Buildings O Scale Buildings S Scale Buildings The links download a zip file that you should copy to your hard drive and unzip there. The patterns are labeled 2-5 - don't look for a "layer one." That was the graphic that included them all before I separated them out.
Or, if you just want to print business signs off on your color printer, you can click here for a sampling. Note About O and S Scale Versions: By the way, the O and S scale versions have three stories, since they fit easily. In addition, I removed the fine windowpane detail from the S scale version, because it's not as likely to cut "clean" at that scale. Of course, this is just the beginning of the storefront projects. You'd want to add signage, maybe shutters, lighting, curtains, interiors, whatever you wanted. If you took any care at all with the finished product, not one visitor in a hundred would guess that it started out on a vinyl cutter. We hope to have more articles on using this process to make buildings - this was just to "whet" your appetite. ConclusionI realize that this article is just a start, and I hope to provide more detailed content eventually. Once I work out some of the bugs in my own processes, of course.In addition, if you've been thinking about getting a cutter for your own or your club's purposes, I hope our articles help you avoid any critical mistakes. Watch this page: more articles are in the works. As always, we want to hear your suggestions, criticisms, additions, etc. Enjoy your hobbies, and especially any time you can spend with your family in the coming months! Paul |
|
Note: Family Garden TrainsTM, Garden Train StoreTM, Big Christmas TrainsTM, BIG Indoor TrainsTM, and BIG Train StoreTM are trademarks of Breakthrough Communications (www.btcomm.com). All information, data, text, and illustrations on this web site are Copyright (c) 1999, 2000, 2001, 2002, 2003, 2004, 2005, 2006, 2007, 2008, 2009, 2010, 2011, 2012, 2013, 2014, 2015, 2016, 2017, 2018, 2019, 2020, 2021 by Paul D. Race. Reuse or republication without prior written permission is specifically
forbidden.
For more information, please contact us
|
||||||||||||||||||||||||||||||||||||||||||||||||||||||||||||||||||||||||||
 and the Silhouette Cameo(r). Click to go to the article.")
 At the time they were planning to have their "sign shop" make the buildings, using a Roland vinyl cutter. I was familiar with signcutters because of my job, so it wasn't any stretch to imagine a well-equipped sign shop layering different colors of vinyl sheeting over a plexiglass "blank" to get the effect of a building.